First Tutorial
Snail - Bionic architecture

Step one: Create the 3d model through the 123d catch
1. Download the 123d catch app from the phone's store


2. Create an autodesk account to make sure that you could have your own database to store your 3d models.
3. Watch the tutorials that have been given on the Internet to understand how to use this software.
(Below is the link of the tutorials)
http://www.123dapp.com/howto/catch
Step two: Create the real model

1. Open your account from the 123d make official website and download your selected model

2. Fix the model's problems by using another software which is called as the Autodesk MeshMixer to make the model becomes a solid one instead of a skin model
( in this case you could change your model shape as well to generate a more beautiful one)

3. Open your finilised model with the 123d make

(In this case red pieces mean there are something wrong with this model and we have to change the numbers of the cutting pieces through the vertical and horizontal way until there is no red appears.)
Another important thing that i want to mention is the thickness option in the 123d make. In order to make it easier to assemble the model the selected thinkness should be a little bit bigger than the thickness of the material that you are going to use. Like setting 3.2mm gap to suit the 3mm thickness materials,otherwise it is quite hard to assemble the model.
4. Export the finilised sheet to dxf files and change the lineweight and color with the adobe illustrators. - Change the cutting line to red and the number line to blue; change the line weight to 0.001.

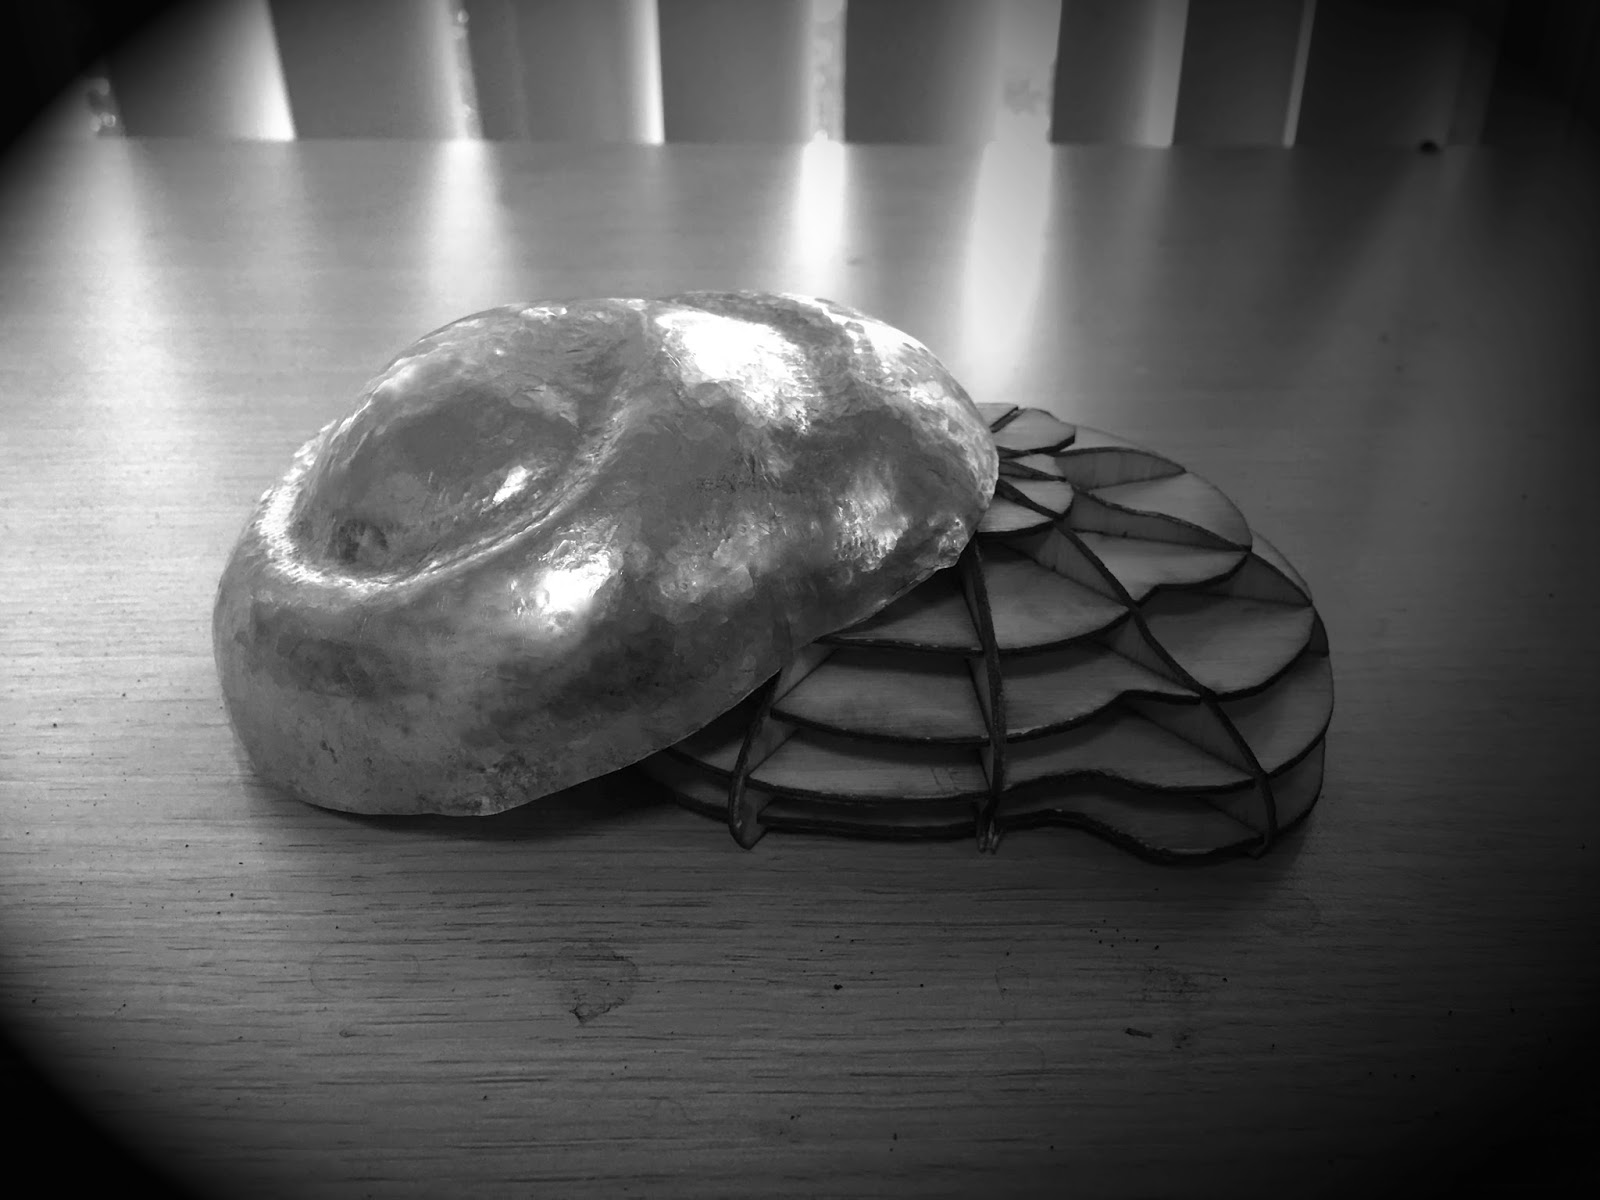
5. Assemble the whole pieces and got the final model
Step Three: Make the metal surface

The new made metal surface

The original one
Process

Draw the appropriate shape on the sheet

Fix the position of the sheet until the line, cutter and your eyes at the same level

First cut the square shape with the lager cutter then use the smaller one to trim it

Cut the rest part of the sheet with this cutter

Get the final round shape
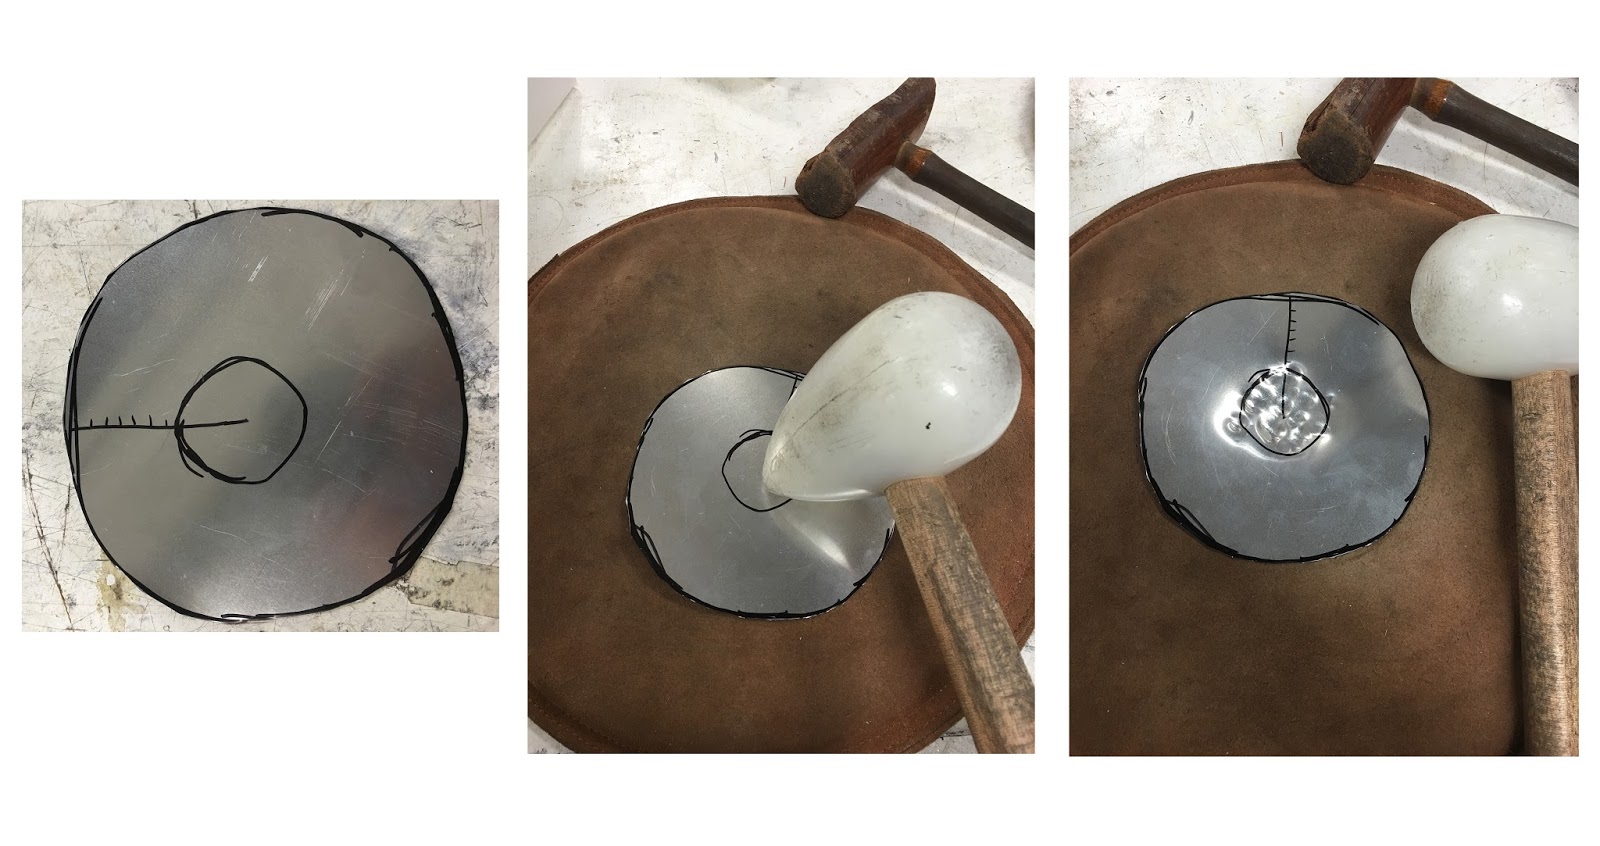
Draw the circule at the center and use the hammer that i showed above to bend it
as the first step to create a dome like shape
(Tip: hammer from the center to the outside, round by round)

use some other equipment in the work lab to help us create the shape

Pictures show how to use these two equipment
(Tip: Please notice the difference between the hammers that i used before, the circular shape hammer is being used to create the first bend as the starting point while the hammer that i showed above has the smaller and rectangular shape at the top which is being used to push the sheet move inward more deeply)

The basic shape has been created

using the Roller and shrink to make the beautiful skin

Pictures show how to use this two equipment
(Tip: for the roller remember to change the gap between two roller to suit the thinkness of your selected sheet; for the shrinker we need to do it slowly and carefully otherwise it will be quite easily causing the sheet to crease too much. If it is over-shrinking, it is very hard to fix.)

The dome like shape then could be generated

Use the marker to draw the whorl on the surface

Get the suggestion from the staff in the workshop and he taught me a good way to make the whorl, which is using the club to pat the surface.

Here is the result.

Then these three hammers will be quite important for the rest metal making

Pictures show how to utilize these three different hammers
(Tip: For different whorl gap we need to select the suitable hammer to achieve the different purpose like use the big and round one to suit the starting point of the whorl while using the smaller one to create the top of the whorl and each two hammers could being used together by cooperating with the equipment that showed in the third picture)

Also here is another tool that could being used

Final Stage: Using the square shape hammer to clean the surface of the sheet
- try to remove the hammer markers on the surface
- use the methylated spirits to clean the marker evidence
- use the sandpaper to clean the surface
( Tip: the most important thing in this case is the sandpaper, only if you have quite successfully used the square hammer to smooth the surface, then do not use the sandpaper to clean the surface. Otherwise the surface will looks very ugly
Final result


No comments:
Post a Comment